How to Install a Chandelier: A Step-by-Step Guide
The Ultimate Guide: Installing Your Chandelier with Confidence
The Problem: A Dark Room and a Daunting Task
Let's face it: a dim room can be a real mood killer. You've finally chosen the perfect chandelier to illuminate your space and elevate its style, but the thought of installing it yourself can be intimidating. Wires, weight, ceiling heights – it's enough to make anyone hesitate. Many homeowners struggle with understanding electrical wiring, ensuring the fixture is securely mounted, and dealing with the sheer weight of some chandeliers. This guide is designed to eliminate that fear and empower you to tackle this project with confidence.
Our Solution: A Clear Path to Chandelier Installation Success
We understand the challenges of DIY projects. That's why we've created a straightforward, step-by-step guide to help you install your chandelier like a pro. Whether you're dealing with a sloped ceiling, a heavy fixture, or limited attic access, we'll provide the knowledge and techniques you need to get the job done safely and efficiently.
Gathering Your Tools and Materials
Before you begin, make sure you have the following:
- A new chandelier
- Safety glasses
- Gloves
- Wire strippers
- Wire connectors
- Electrical tape
- Screwdrivers (various sizes)
- Pliers
- Voltage tester
- Ladder
- Drill (if needed)
- Pencil
- Level
- A helper (especially for heavy chandeliers)
The Plan: Step-by-Step Chandelier Installation
Safety First: Turn Off the Power. Locate the circuit breaker that controls the lighting fixture you'll be replacing and switch it off. Use a voltage tester to confirm that the power is off before proceeding.
Remove the Old Fixture. Carefully detach the old light fixture. Disconnect the wires, using wire connectors to cap them off for safety. Ensure the junction box is in good condition and properly secured to the ceiling.
Prepare the Chandelier. Unpack your new chandelier and familiarize yourself with its components. Follow the manufacturer's instructions for assembling any parts that need to be put together. Adjust the chain or downrod to the desired length. Consider the room height; a dining room chandelier should typically hang 30-36 inches above the table. For foyer chandeliers, ensure ample headroom.
Install the Mounting Bracket. Attach the mounting bracket that came with your chandelier to the junction box. Ensure it is securely fastened and can support the weight of the fixture, especially if you're dealing with a heavy chandelier. For sloped ceilings, use a specialized adapter to ensure the chandelier hangs straight.
Wire the Chandelier. Connect the chandelier wires to the house wires, matching the colors (black to black, white to white, and ground to ground). Use wire connectors to securely join the wires. Wrap the connections with electrical tape for added safety. If you have no attic access, be extra careful to make secure connections within the junction box.
Attach the Chandelier. Carefully lift the chandelier and attach it to the mounting bracket. This step may require a helper, especially for large or heavy chandeliers. Secure the chandelier according to the manufacturer's instructions.
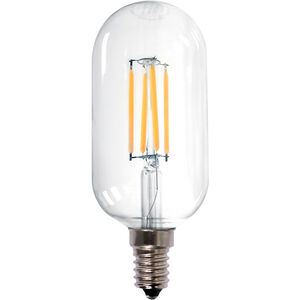
Install the Bulbs and Canopy. Install the light bulbs and attach the canopy to conceal the wiring and mounting hardware.
Restore Power and Test. Turn the circuit breaker back on and test the chandelier. If it doesn't work, double-check your wiring connections.
Success: Enjoy Your Beautifully Lit Space!
Congratulations! You've successfully installed your new chandelier. Now you can enjoy the enhanced ambiance and style it brings to your home. Whether it's a modern chandelier in your living room, a crystal chandelier in your dining room, or a farmhouse chandelier in your kitchen, you've transformed your space with your own hands. Brushed nickel, black, and bronze chandeliers are popular finishes that can complement various décor styles. If you've installed a chandelier with a remote control, familiarize yourself with its functions for customized lighting control.

WAC Lighting

WAC Lighting


WAC Lighting


American Lighting


WAC Lighting


WAC Lighting

Commonly Asked Questions About Ceiling Lights Chandeliers how to install a chandelier
Q: Is it difficult to elevate the ambiance of my room with a beautiful new chandelier?
A: Not at all! Chandeliers are a fantastic way to add elegance and personality to any space. They can truly transform a room into a stunning showpiece and become a beautiful focal point.
Q: Will a chandelier add a touch of sophistication and style to my home?
A: Absolutely! Chandeliers are renowned for their ability to bring a sense of luxury and refinement. They are a design element that can greatly enhance the overall aesthetic of your home.
Q: Can a chandelier be a worthwhile investment for my home's overall appeal?
A: Definitely! Chandeliers not only provide beautiful illumination but also serve as eye-catching décor elements. They can significantly contribute to creating a warm and inviting atmosphere within your home.
Q: How can I ensure the chandelier installation process is safe and goes smoothly?
A: For optimal safety and a seamless installation, it's always best to consult with a qualified electrician. They have the expertise to ensure your chandelier is installed correctly and safely, allowing you to enjoy its beauty worry-free!
Q: Will installing a chandelier be a rewarding experience for improving my home's lighting?
A: Without a doubt! A chandelier provides not only functional lighting but also adds a layer of visual interest and artistic flair to your home. It's a wonderful way to brighten your space and showcase your personal style.